Strawberry freezer jam: Simply dazzling in color and flavor. (Get jammin' with this easy tutorial).


When I was a girl, my grandmother's strawberry jam amazed me. How did she capture the taste of fresh-picked summer strawberries that way? And that brilliant ruby red color! Why didn't our jam at home look like that? Then Grammy taught me her secret. Freezer jam. 

Why freezer jam?

Freezer jam is the best way to preserve the summer-fresh flavor of strawberries, because you don't cook it. Cooked strawberries can't compare to the taste of fresh-picked. Likewise, the brilliant red of the berries is preserved when you don't cook the jam.  

Besides it's superior flavor and color, freezer jam beats the heat, too. Canning food in summer has it's place, to be sure, but who wants to slave over a hot stove on a 90 degree day if there's the option to freeze jam instead?

In this article, I'll show you how to make freezer jam the way Grammy did, including her little secret that gave every jar of jam that extra little sparkle that would take you right back to summertime, even in the dead of winter. 

What you will need

1 quart (4 cups) firm ripe strawberries cut in half. 
4 cups white granulated sugar 
1 fresh medium-size lemon
3/4 cup water
1 box (1.75 ounces) powdered fruit pectin 
(I like to use Sure-Jell, the yellow box)


Other supplies

6 Jelly jars with lids, washed and dried
A potato masher (or food processor)
Large mixing bowl
zest grater


Always start with firm, ripe
berries. These are from my garden, but
my family also likes to visit a u-pick farm
for large gatherings of fresh,
affordable strawberries to make
many batches of jam.


How to make strawberry freezer jam.


STEP 1: You will need 4 quarts whole strawberries to make approximately 2 cups of crushed berries. Wash, hull and cut your strawberries into manageable pieces that will be easy to mash.


Wash, hull and cut strawberries
into manageable pieces.


STEP 2: Using a potato masher, gently crush 1 cup of berries at a time, mashing them into a rough pulp. I like this method, because I want my jam to have texture with some berry parts detectable. If you prefer, you could also use a food processor. If using a food processor, pulse to chop the berries into fine pieces, but do not puree. Technically, jam is supposed to have small pieces of fruit in it. Pureeing the berries would create a jelly, as it would be smooth and absent of any chucks. 

When you're done mashing the berries, remove a 1/4 cup of the juice to help ensure a firm set. 


Crush the berries, one cup at a time,
into a rough pulp.

STEP 3: Now it's time for the ingredient Grammy used to help her jam retain that bright, sunny fresh-picked flavor all year: LemonLemon makes strawberry freezer jam positively sparkle with flavor! First, add 2 tablespoons fresh squeezed lemon juice to the berry mix and stir it in. Then, add a 1/2 teaspoon lemon zest and stir it in. Adding lemon is like adding a ray of sunshine to every jar. 

Fresh lemon, the ingredient
that helps capture summer's flavor. 

STEP 4: Now measure the exact amount of sugar and place it in the mixing bowl. Measure 2 cups exactly of the crushed strawberries and add them to the bowl with the sugar. Mix together well. Let the bowl stand for 10 minutes, giving it a stir now and then. 

When measuring the sugar and
berries, it's important to be
precise.

STEP 5: While the berry mix is left to stand, prepare the pectin. In a small saucepan, stir together one box (1.75 ounces) powdered fruit pectin and 3/4 cup water. It's okay if it's lumpy at first. Over high heat, bring the pectin to a boil, stirring constantly. Let it boil for 1 minute, stirring continuously then remove from heat. Add the cooked pectin to the fruit mixture and stir it in. Stir for 3 minutes, until the sugar dissolves. I've found that regular granulated sugar works better than the raw, more course kind, as the latter takes much longer to dissolve. When you're done, you may still see a few sugar crystals, which is okay.


The hot pectin mixture
dissolves the sugar as you
stir for 3 minutes.

Step 6: Using a canning funnel, fill the jelly jars, leaving 1/2-inch headroom for expansion in the freezer. Place the lids on, then let stand undisturbed at room temperature for 24 hours. Freezer jam will last for 3 weeks in the refrigerator, or 1 year in the freezer. When using your jam from the freezer, place it in the fridge to thaw, then use it up within 3 weeks. 


One batch yields up to 6
8-ounce jelly jars of jam.

See how easy freezer jam is? In my family, we've got this process down so it only takes about 15 minutes per batch. We like to make several batches in one day, enough to last the year.


Some final thoughts...

Freezer jam is so easy to make and so delicious. Why not make a day of it? Visit a u-pick farm (or a farmers market), buy several flats of berries and get jammin'! Then you too can enjoy one of the best flavors of summer--all year 'round! 

Until next time...

Joy--Fearless Farm Girl,

"Farm girl; it's a verb, because it's what you do."

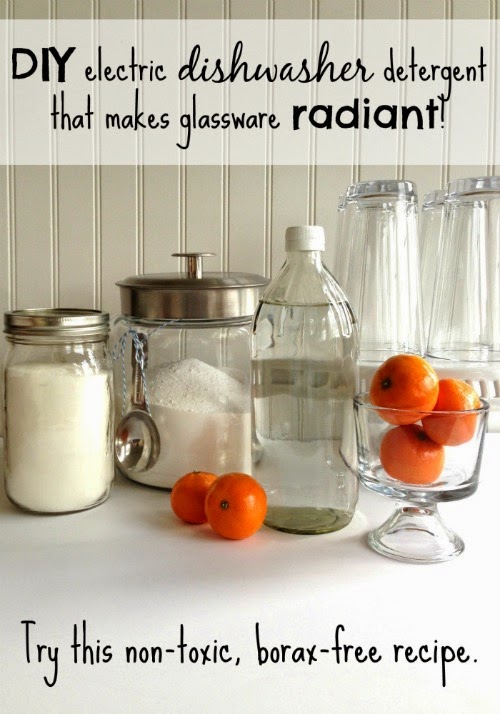
Homemade DISHWASHER DETERGENT that works like a charm! (Non-toxic, Borax-free recipe).


I don't know about you, but I'm pretty done with pulling glasses from my dishwasher that look all cloudy and gross. When I go to the trouble to clean my dishes, I want that glass to glister like diamonds in the sun! Don't you? If cloudy glass is all I'm gonna get from store-bought electric dish soap, then forget it. That's how I came to making my own, folks. 

Then something happened while creating a homemade electric dish soap recipe: I learned a little-known secret about making a DIY recipe work. It has to do with chemistry (which I'm no wiz at, let me tell ya, but lucky for me, this is pretty basic). Now today's your lucky day, because I'm going to let you in my secret!

Watch and learn, my friend. Watch and learn.


See this glass? It just came straight from my dishwasher. Yep. Load after load, my glassware looks amazing!


How to make and use homemade electric dishwasher detergent with success...

Ingredients

(Makes one batch that will supply 50-60 loads, depending on how rounded your tablespoons are)

4 cups washing soda
4 cups citric acid
25-35 drops tangerine essential oil (or your choice)
Distilled white vinegar

Ingredient Chart (the what-for of each ingredient)

The beauty of this recipe is that it's all-natural and non-toxic, unlike so many commercial brands. Even many store-bought brands that claim to be environmentally friendly and green often contain harmful chemicals you'd rather not have on your dishes. And it's hard to trust the labels: Companies aren't required to tell you everything they put into their products, so you might believe it's safe when, in reality, there may be something harmful lurking inside. With homemade detergent, you know exactly what's in your dishwasher detergent. Check out what's in this recipe and why:

Washing Soda:
  • Purpose: Cleanser and water softener. Soft water helps avoid the mineral deposits that can make glass appear cloudy. Washing soda is 50% more effective than salt, baking soda, or Borax when it comes cleaning power and water softening ability (so there's really no need to add these other things).
  • What is it? Sodium carbonate is a PH regulator, as well as a food additive used as an acidity regulator, anti-caking agent, raising agent, and stabilizer.
  • Is it safe? Naturally!
OxiClean Laundry Baby Stain Soaker:
  • Purpose: Stain remover. Helps remove mineral stains and deposits, and hard water spots from glass and metal. Works to remove food stains from plastic cutting boards and other plastics.
  • What is it? Sodium carbonate peroxide and sodium carbonate (powdered hydrogen peroxide). It releases oxygen when water is added. It's made from treating baking soda with hydrogen peroxide.
  • Is it safe? Yes. This product scored an A by the EPG (Environmental Work Group). Only the Baby variety is recommended here, as it contains only two ingredients that are both eco-friendly, and no other ingredients. (Other OxiClean products may contain ingredients with higher risk factors, and are therefore not recommended).
Citric Acid:
  • Purpose: Water softener. Helps eliminate mineral deposits and hard water build-up from your dishes. An antibacterial and antiseptic. Helps remove stains, such as coffee and tea.
  • What is it? A crystalline acid present in lemons and sour fruit.
  • Is it safe? Two thumbs up!
Distilled White Vinegar:
  • Purpose: Rinse aid. Helps remove residue (that white powdery stuff) from dishes.
  • What is it? Acetic acid and water. A mild acid used for cooking, baking, medicinal, and cleaning purposes.
  • Is it safe? Positively!
Essential Oil:
  • Purpose: Natural, non-toxic fragrance.
  • What is it? All-natural, fragrant plant-based oil.
  • Is it safe? Absolutely. (Just make sure it's Certified Pure Therapeutic Grade, and you're good to go.)

See? All good stuff!

Now here's how to bring all those goodies together...


Step 1: In a large (10 to 16 cup capacity) canister, combine 4 cups washing soda and 4 cups OxiClean (baby variety). Mix well. Cap with an air-tight lid and set aside.

Combine the washing
soda and OxiClean in its
own large, air-tight
canister.

Step 2: In a separate large mixing bowl, mix the tangerine essential the citric acid with a fork until well blended. Place the scented citric acid in its own quart size mason jar or other air-tight canister. Do not mix the citric acid with the washing soda mix, as the citric acid will make the mix harden into a firm impossible-to-use lump, because it draws moisture to itself. Also, as I explain in a moment, it's important for the citric acid and washing soda to be kept separate during the cleaning cycles in your dishwasher in order to see clean dishes. 

Place the citric acid in its
own air tight container.

Step 3: Store the vinegar in it's own bottle. For convenience, keep a bottle near the other two containers dedicated for the purpose of using in your dishwasher. Do nothing to the vinegar. This recipe is so simple, you'll use it just like it is, plain. 

Do not add essential oil
to the vinegar. It should
be used plain.

Now for the method--The little known secret that makes all the difference... 

Did you know that if you mix washing soda and citric acid in water, they neutralize each other? That's because washing soda (sodium carbonate) is an alkaline base, while citric acid is acidic. You've probably seen before how baking soda and vinegar react when combined: The mix creates a fizzy, frothy explosion and when it's all over you're left with a flat neutral liquid. It's the same when citric acid and washing soda combine with water: It produces a similar kind of reaction. There's a bunch of fizzing as the two create carbon dioxide together, and when it's over, they're both neutralized. 

What does this mean for your dishes? It means that when combined in water inside your dishwasher, both the citric acid and the washing soda lose their poop and can't do they're cleaning jobs anymore. 

So here's the SECRET: You have to keep them separate. Let them do their jobs individually (Here I am thinking I'm so smart, and you probably already know this don't you)! 

Here's how to set your dishwasher up with your homemade products:

Your dishwasher should have three reservoirs: A pre-wash compartment, a larger compartment for the main wash, and a rinse-aid compartment. Fill the reservoirs as follows:
  1. Put 1 tablespoon of the washing soda / OxiClean mix in the smaller prewash reservoir. 
  2. Put 1 tablespoon citric acid in the larger main wash reservoir.
  3. Fill the rinse-aid reservoir with the vinegar. You will only need to refill this every now and then when it runs low.

That's all there is to it! Now run your dishwasher the way you normally do. This recipe and method have been working beautifully for me for some time now. And I would expect it to work for you in the same way, however, some variables, such as the hardness or softness of your water could change the outcome for you. So here's some tips...

Tips to help your dishes shine:
  1. Remove food and grease residue before loading dishes in the dishwasher. I keep a little scrubby sponge at my sink. I put a little soap on it and give each dish a quick scrub and rinse to remove dried on food or lip-stick before loading.
  2. Wash porcelain enamel by hand. This recipe could cause some porcelain enamel finishes to oxidize and lose their luster. I've had mixed results with porcelain enamel, so I wash mine by hand just to be on the safe side.
  3. Always start with spot-free, unclouded glasses and dishes. If your glasses are already cloudy with mineral deposits, or covered in residue by some other detergent, don't expect this recipe to magically fix them. You should soak them in vinegar and scrub them with a non-abrasive scrubby to remove existing build-up first. Then you can put them through your dishwasher with this recipe and they should come out in as good of shape as they went in.  
  4. Use a heated drying cycle, as this gets rid of water that could leave spots. (I like the heated dry option, but you may like how air dry works better. I've heard recommendations for both, so you'll have to decide which you prefer).

Don't you love that empowered feeling you get when you learn to make your own cleaning products that really work. It feels awesome to pull gleaming glasses from my dishwasher now, knowing they're radiant all because of my homemade product (that works better than store-bought)! You should really try it!

What're you still doing here? Go make some electric dish soap, silly!

Seriously. Go. 


Until next time...

Joy--Fearless Farm Girl,

"Farm girl: it's a verb, because it's what you do."


SUBSCRIBE BY EMAIL
Like what you're reading? Stay inspired to achieve a more simple, self-reliant way of life. Sign up to receive our newsletter and each new post directly in your 
inbox! CLICK HERE to subscribe!


Disclosure: This post contains affiliate links. That means if you click through and make a purchase, we receive a small percentage in commissions from the company you buy from. We value you as a reader and want you to know that the products we link to are only products we use ourselves or that we feel will add value to your life. Thank you for supporting Farm Girl Inspirations! To read our full disclosure statement click here.

Recommended products related to this post:


More related posts:

Homemade LAUNDRY detergent: Discover the amazing cleaning power of this non-toxic, Borax-free recipe!

Finally! DIY WINDOW CLEANER that cleans like magic.

DIY LAUNDRY TRICKS: Safe, all-natural ways to soften and freshen laundry.

DIY Glass SPRAY BOTTLES to safely store homemade cleaners.